Create a new menu
- Intro #1
- Creating a new menu #2
- Add a new page in the menu #3
- Creating a sub-page (2 level menus) - Columns #4
- Creating a sub-page (2 level menus) - Pages #5
Intro
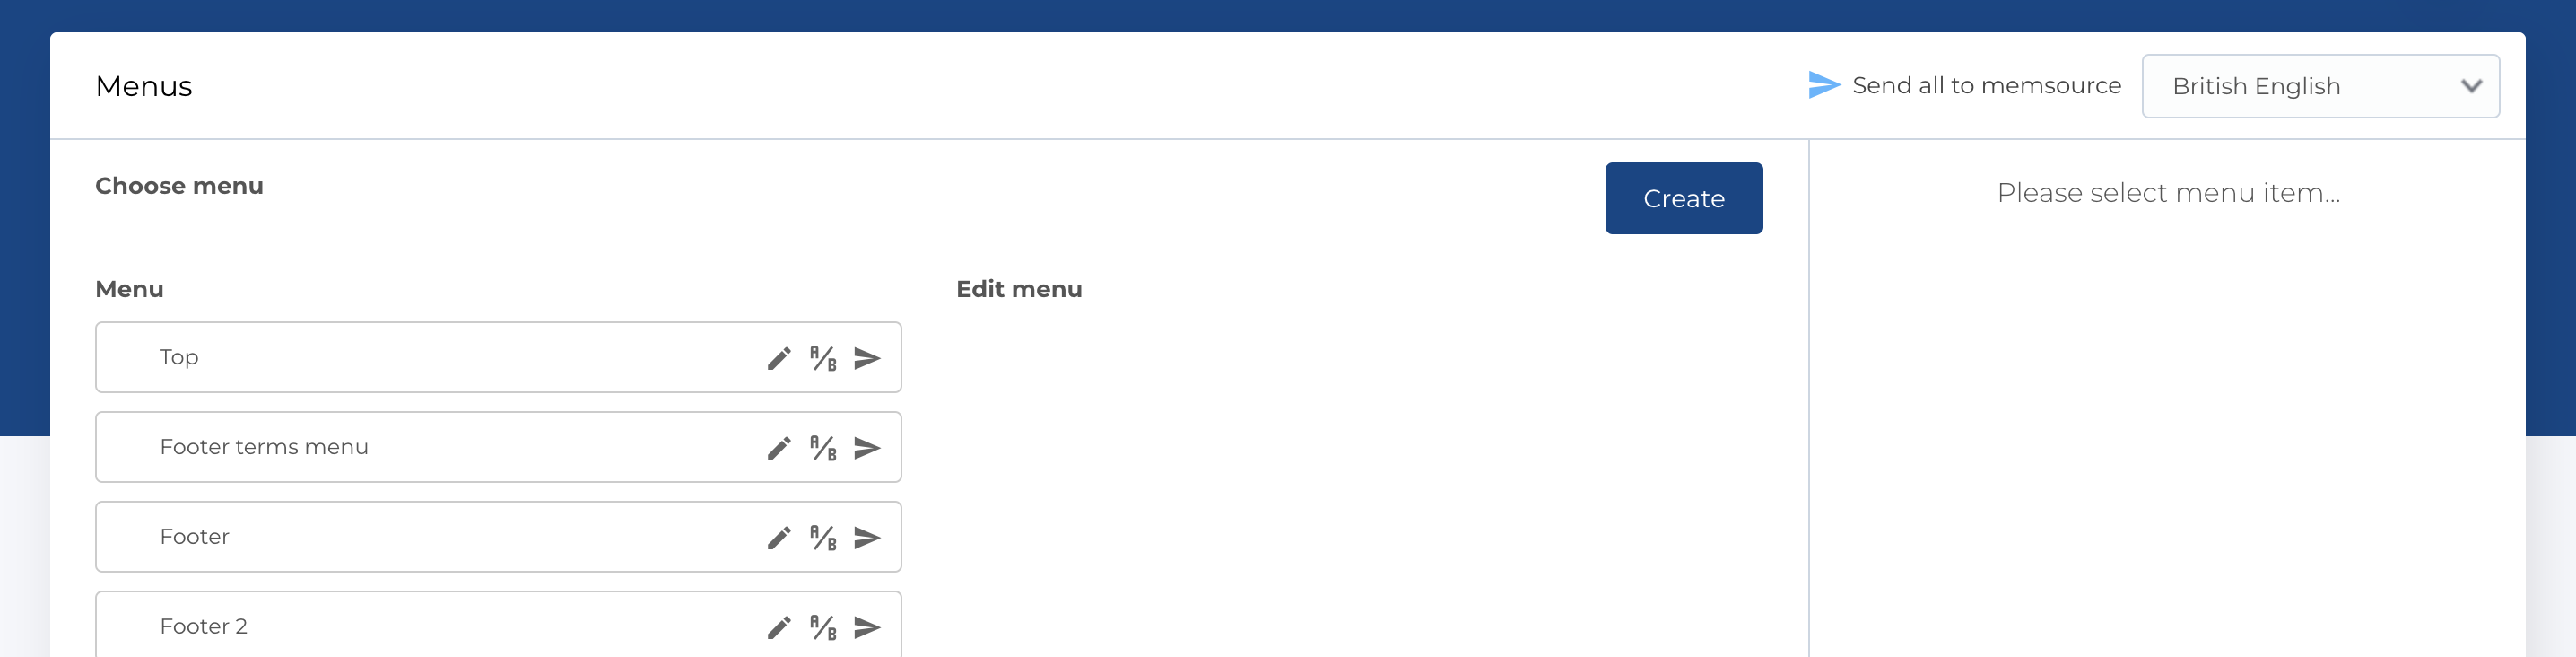
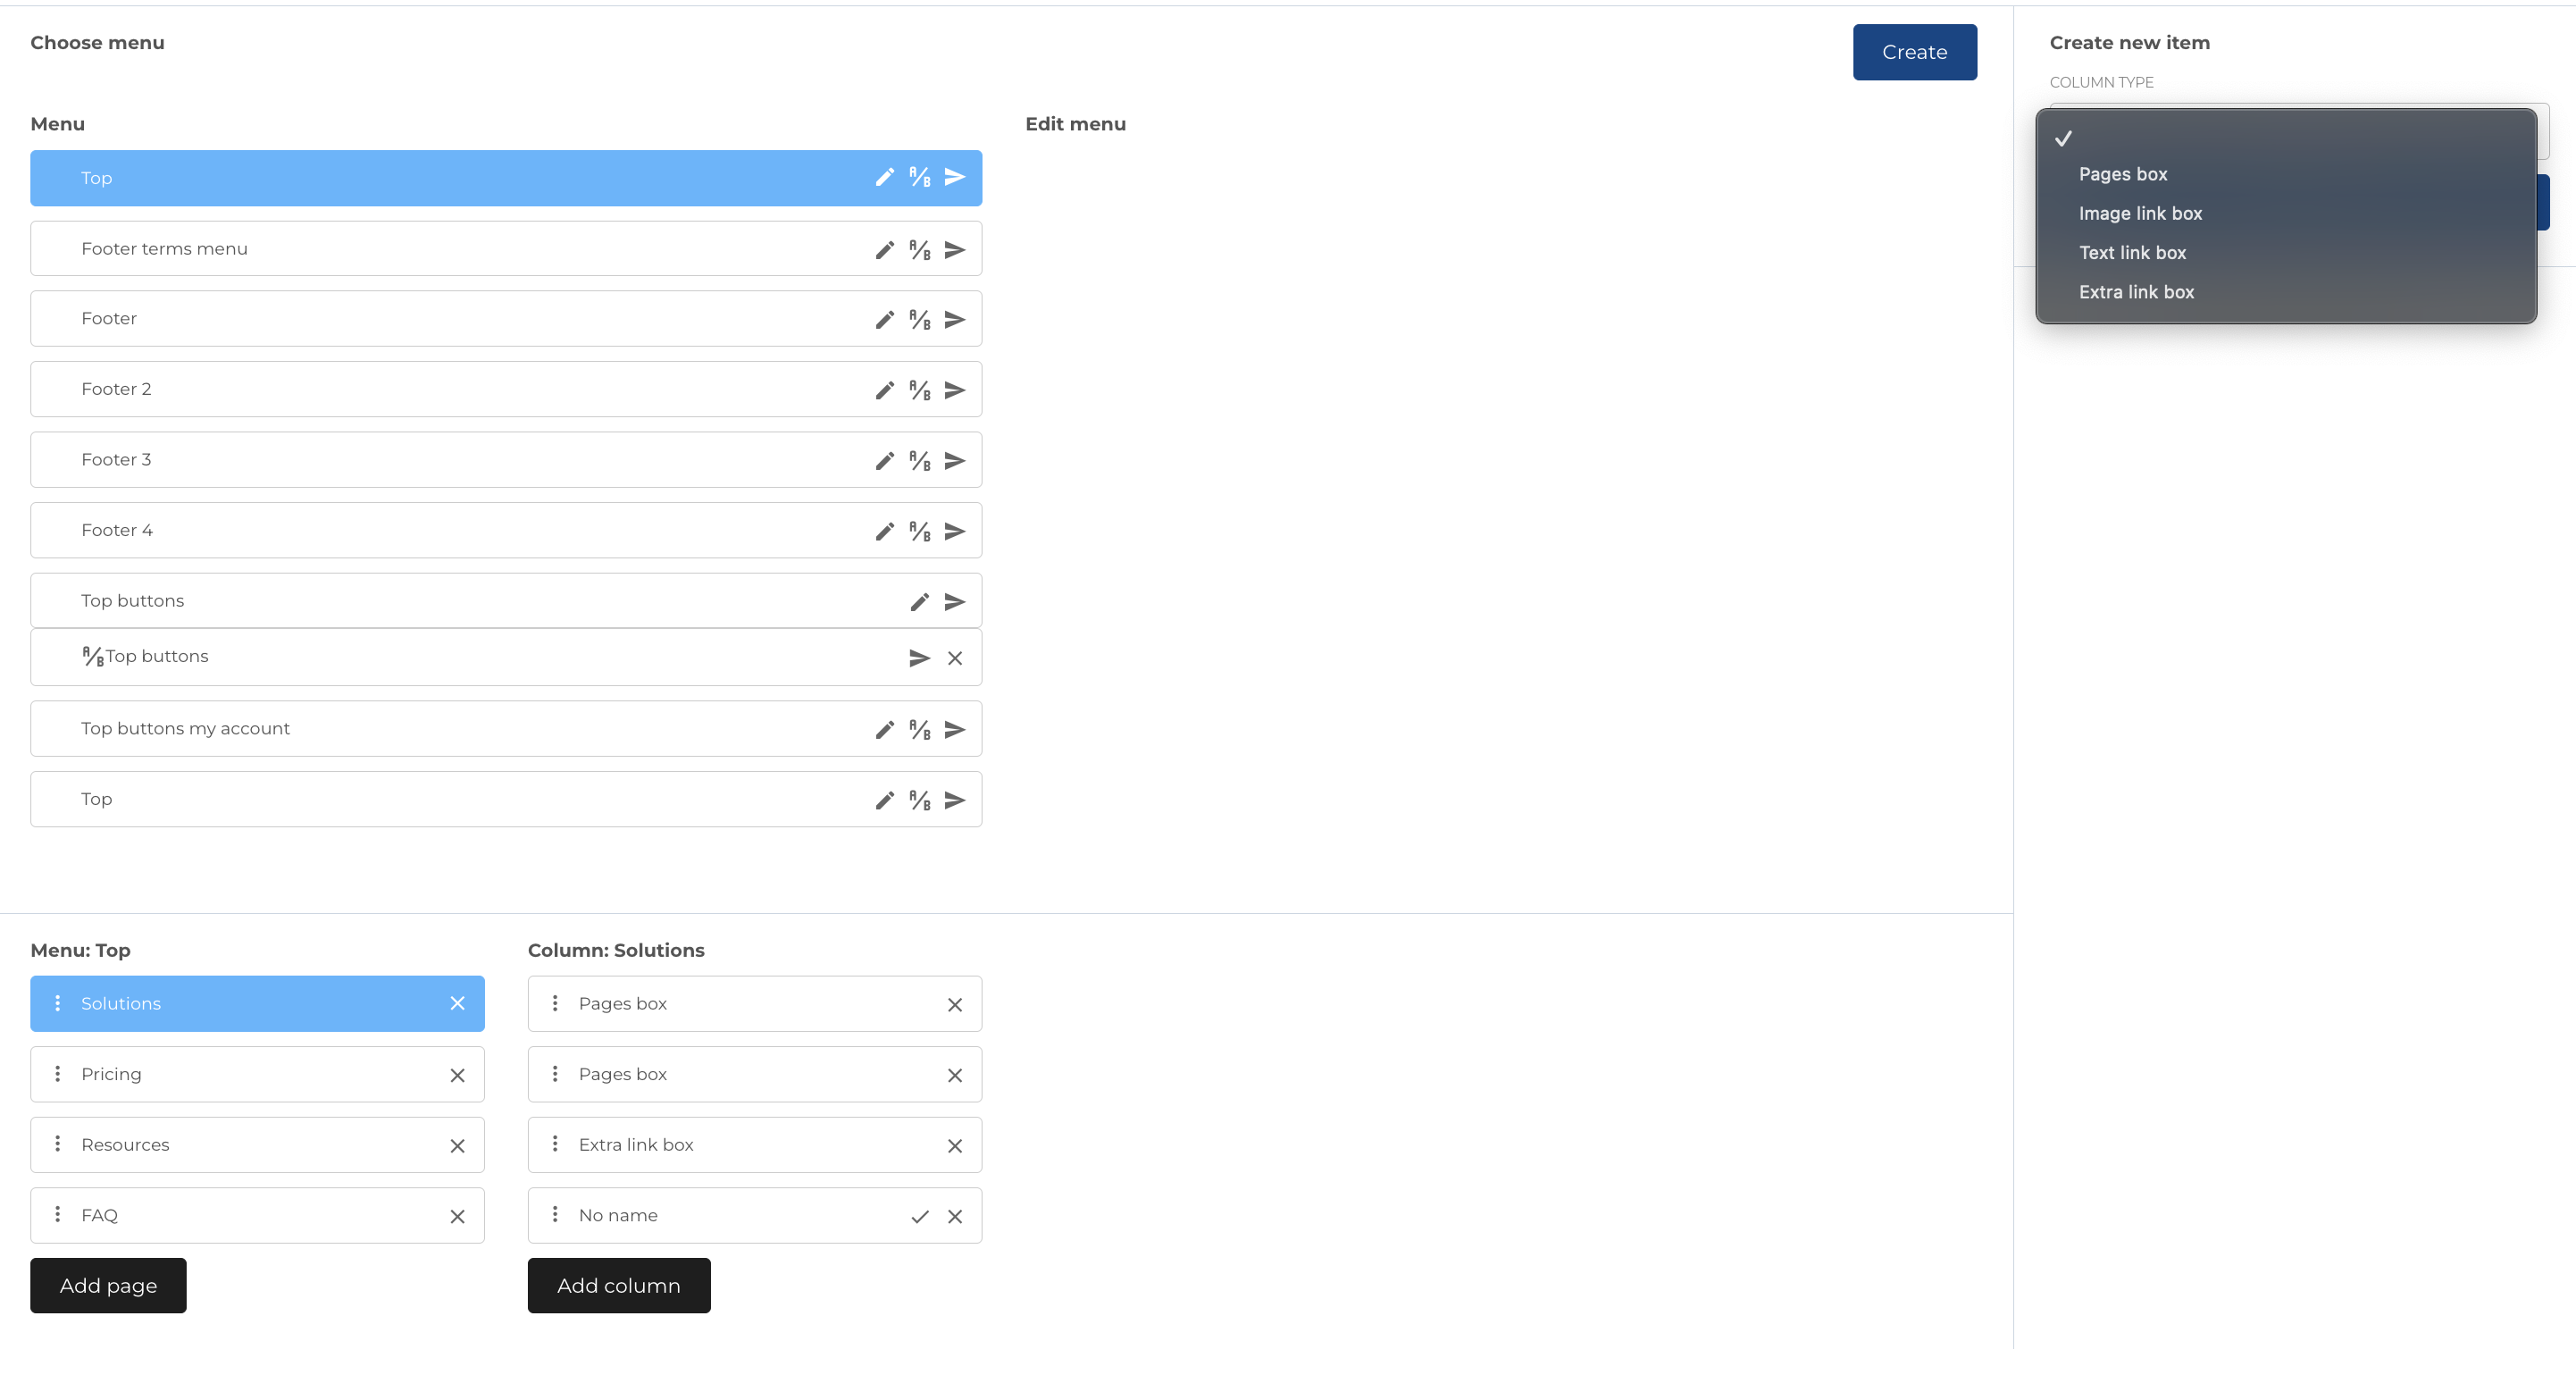
Creating a new menu is possible from the section Menu of admin panel, by clicking Create button.
Creating a new menu
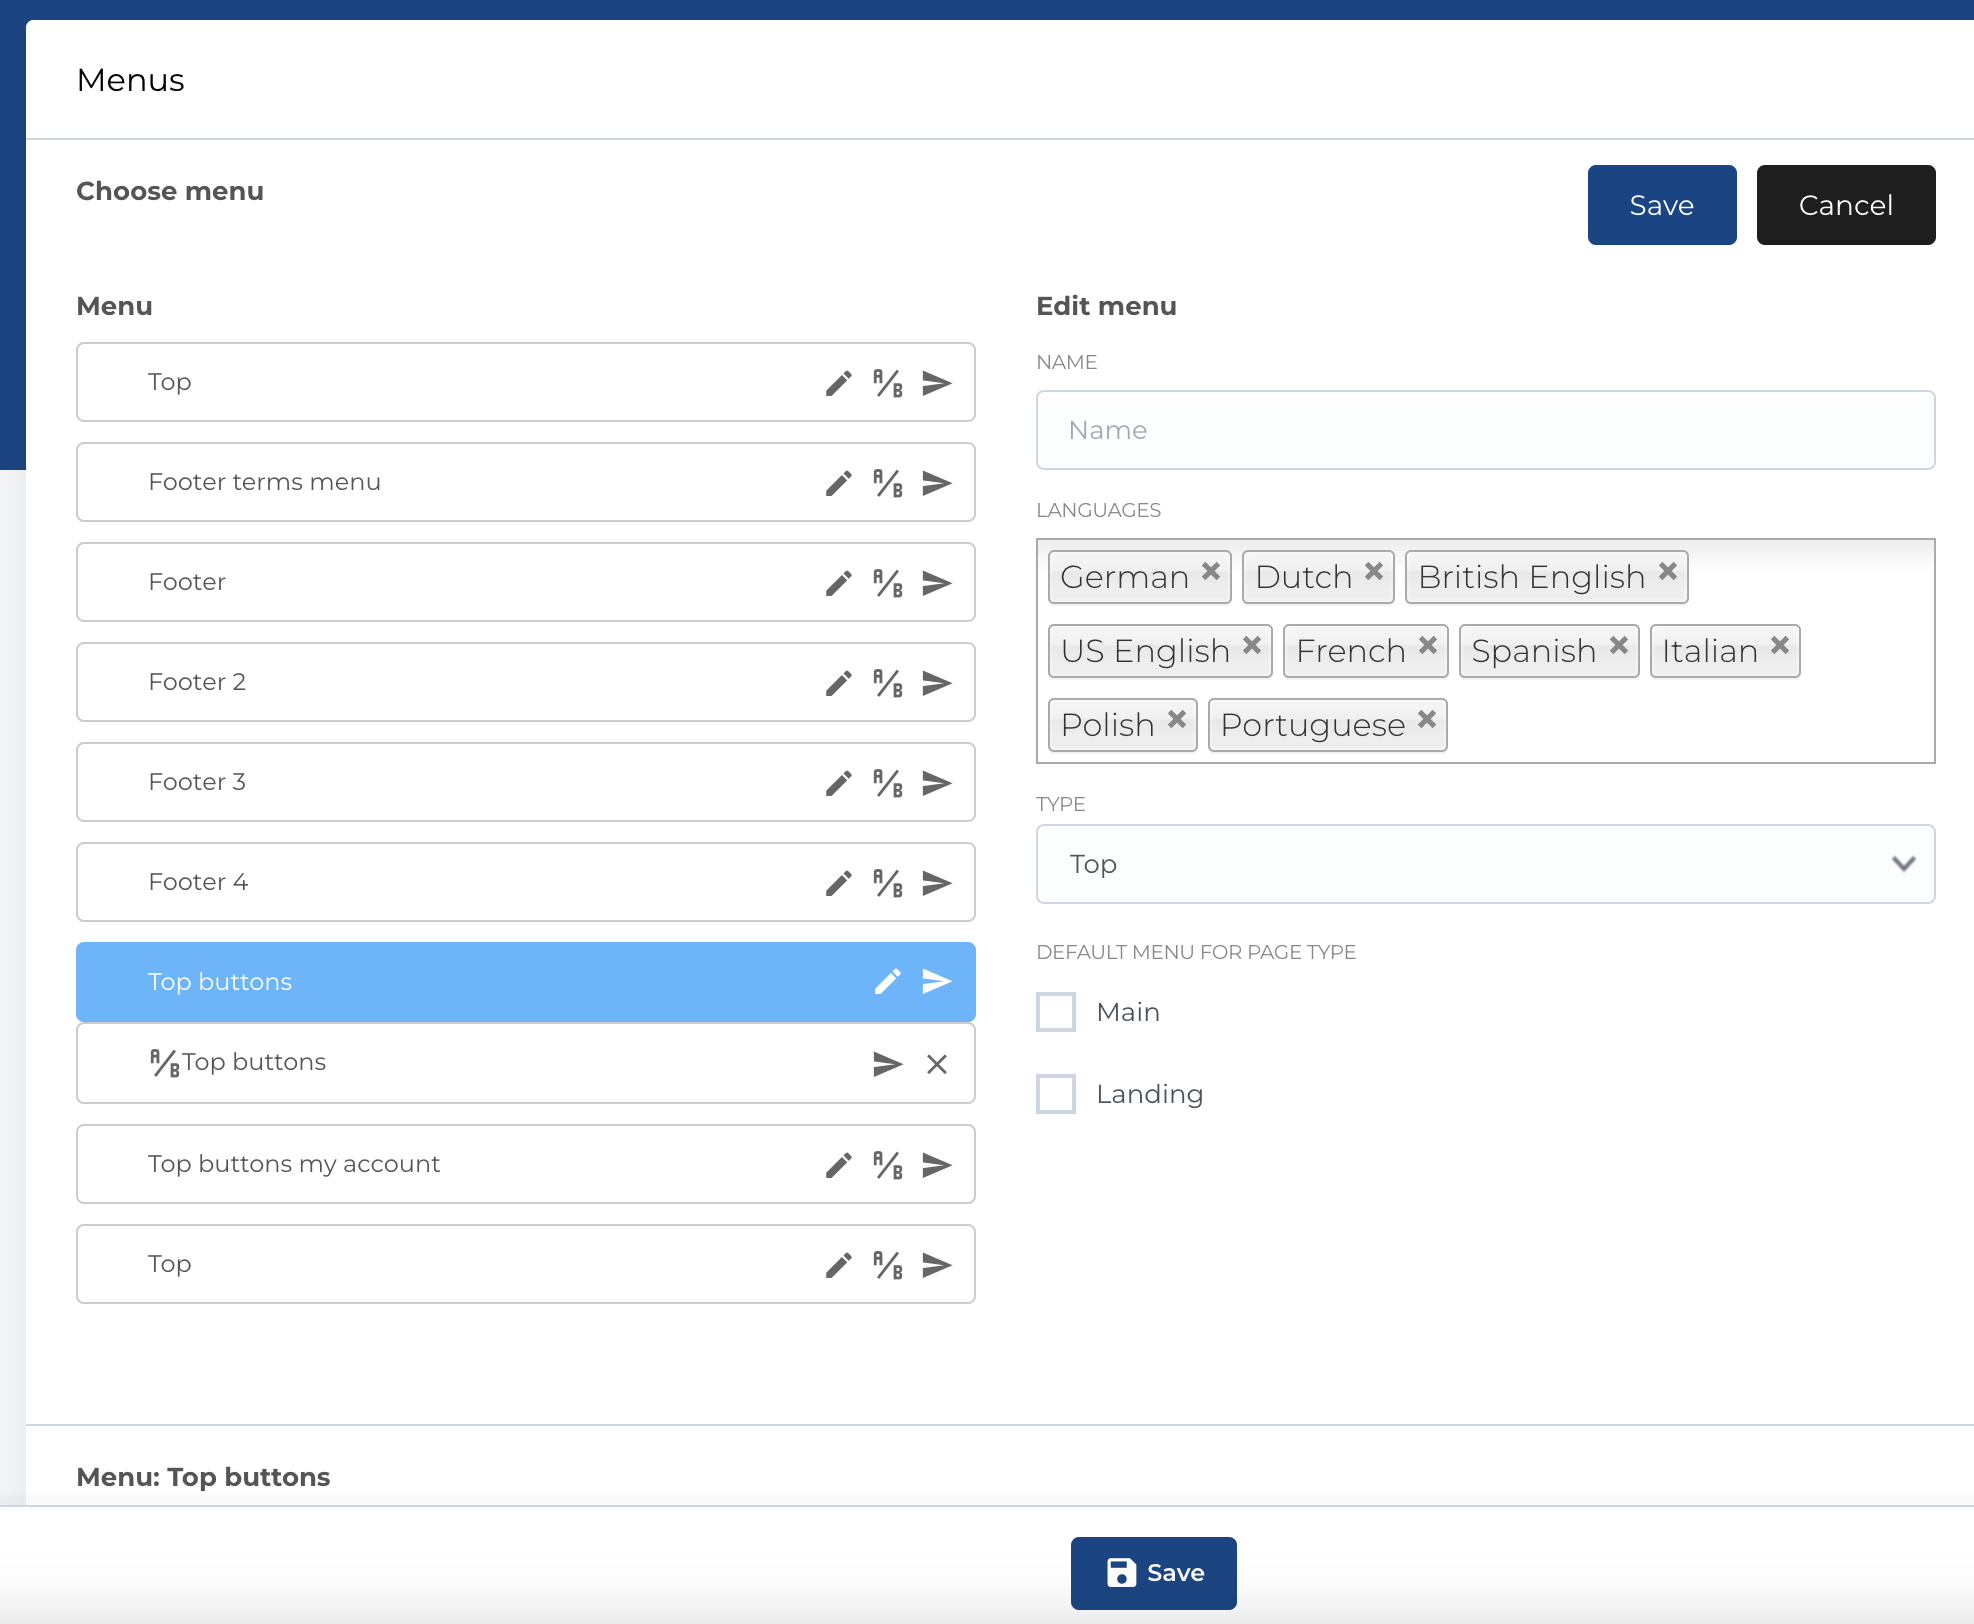
After we clicked Create button, form for menu will be displayed next to menu list and Create button will be replaced with Save and Cancel buttons to save menu or cancel creation / editing menu.
Menu form has next fields:
- Name
- Languages (on which language this menu will be visible)
- Type (Top, Top buttons, Footer, described here)
- Default menu for page type (Main, Landing, described here)
Mandatory fields:
- Name
- Type
After filling fields and saving form - new menu will apear in menu list, now you can add menu items to newly created menu
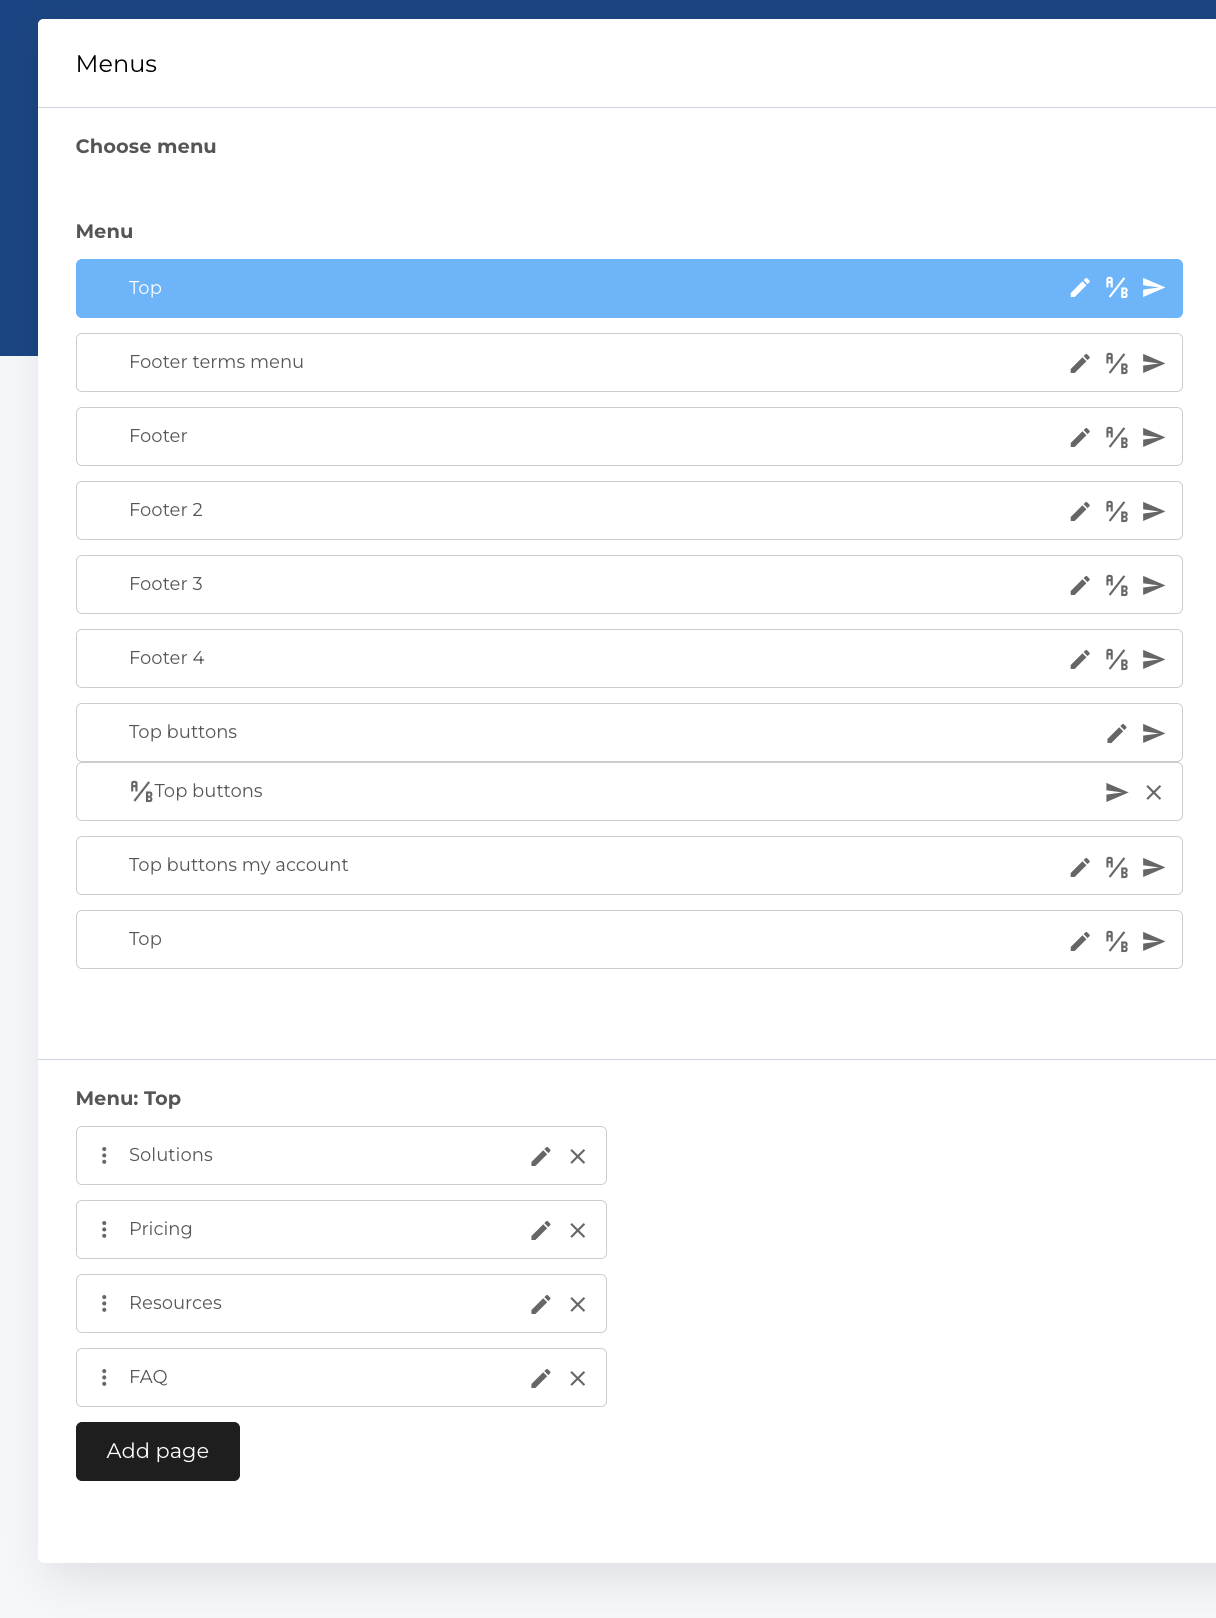
Add a new page in the menu
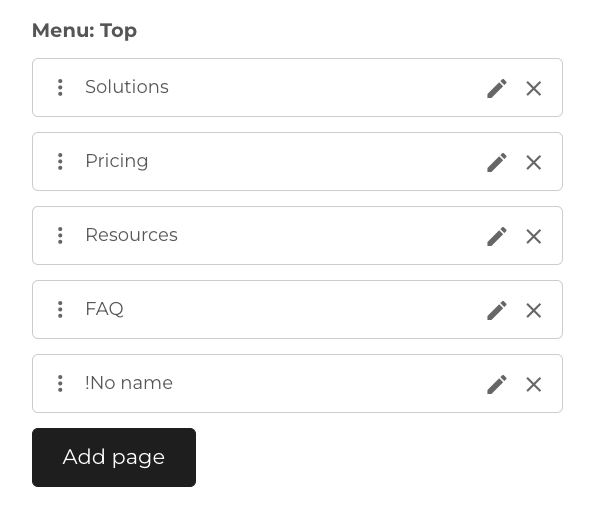
To create new menu item first select menu (by clicking on it), after menu will be highlighted as selected and under menu list will apear list of menu items and button Add page
- The new menu item is being added to the menu by pressing the
Add pagebutton. - It will first be displayed this way (
!No name), as no configuration for it is available. - Next, we need to click on the
Editicon on the newly added page
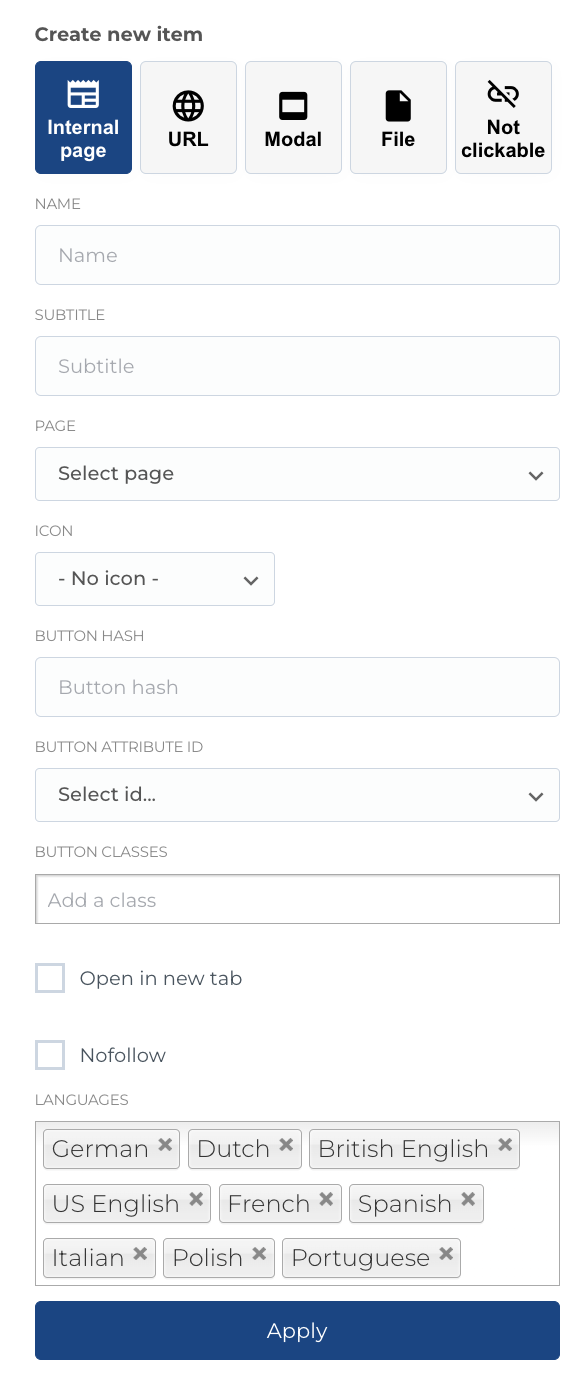
Menu item configuration
- A sidebar for the configuration will be open, where we can configure the page. Configurations available are for:
- Link type (Internal page, URL, Modal, File, Not clickable)
- Name
- Subtitle (NOT USED IN OUR CASE)
- Page (if selected
Internal pagetype) - URL (if selected
URLtype) - Modal (if selected
Modaltype) - File (if selected
Filetype) - Icon configuration
- Button hash (if provided - this text will be appended to the link with
#) - Button attribute ID
- Button classes (extra classes will be added to link or button)
- Language configuration
- Nofollow (add
rel="nofollow"attribute) - Open in a new tab More details you can find here.
- After configuring - we need to press
Applyto apply the changes - When we configurated all pages - we need to save all changes by clicking
Savebutton in the bottom of the page
Creating a sub-page (2 level menus) - Columns
If the website supports sub-menus - we have also the possibility to build sub-pages / sub-menus from the menu configuration page.
For this we need first create column (box) where our sub-pages will be. We need to click on the first level page (NOT the Edit button), which will open up a second column of the menu columns.
Next actions to create column:
- The new menu item is being added to the menu by pressing the
Add pagebutton. - It will first be displayed this way (
!No name), as no configuration for it is available. - Next, we need to click on the
Editicon on the newly added page
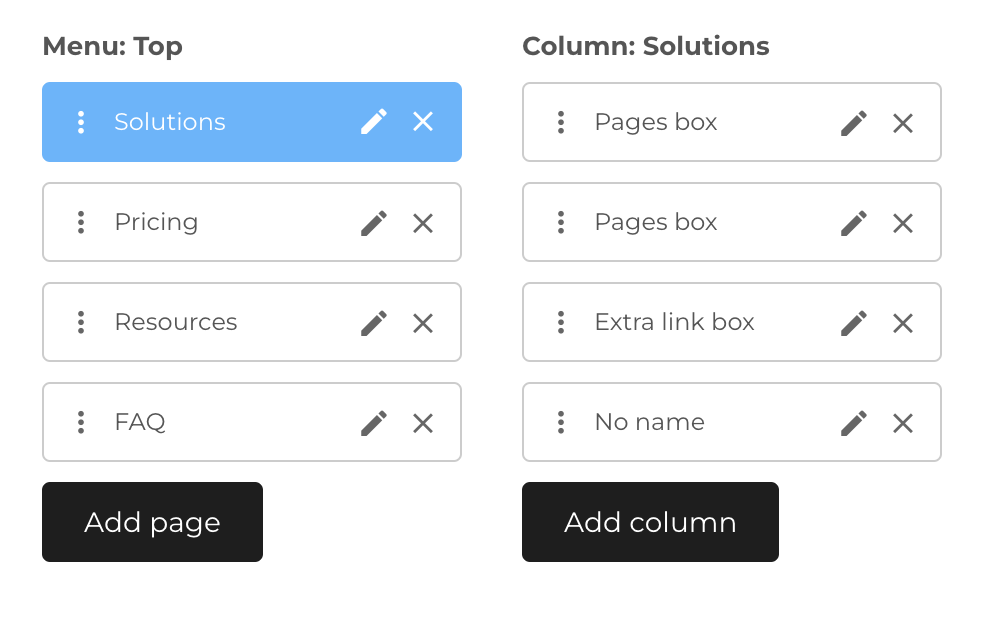
- A sidebar for the configuration will be open, where we can configure the column. We can configure column type. Types available:
- Pages box
- Image link box
- Text link box
- Extra link box
Each type has different view (for example on screenshot you can see Pages box and Text link box)
5. After configuring - we need to press Apply to apply the changes
6. Next we can add sub pages in this column.

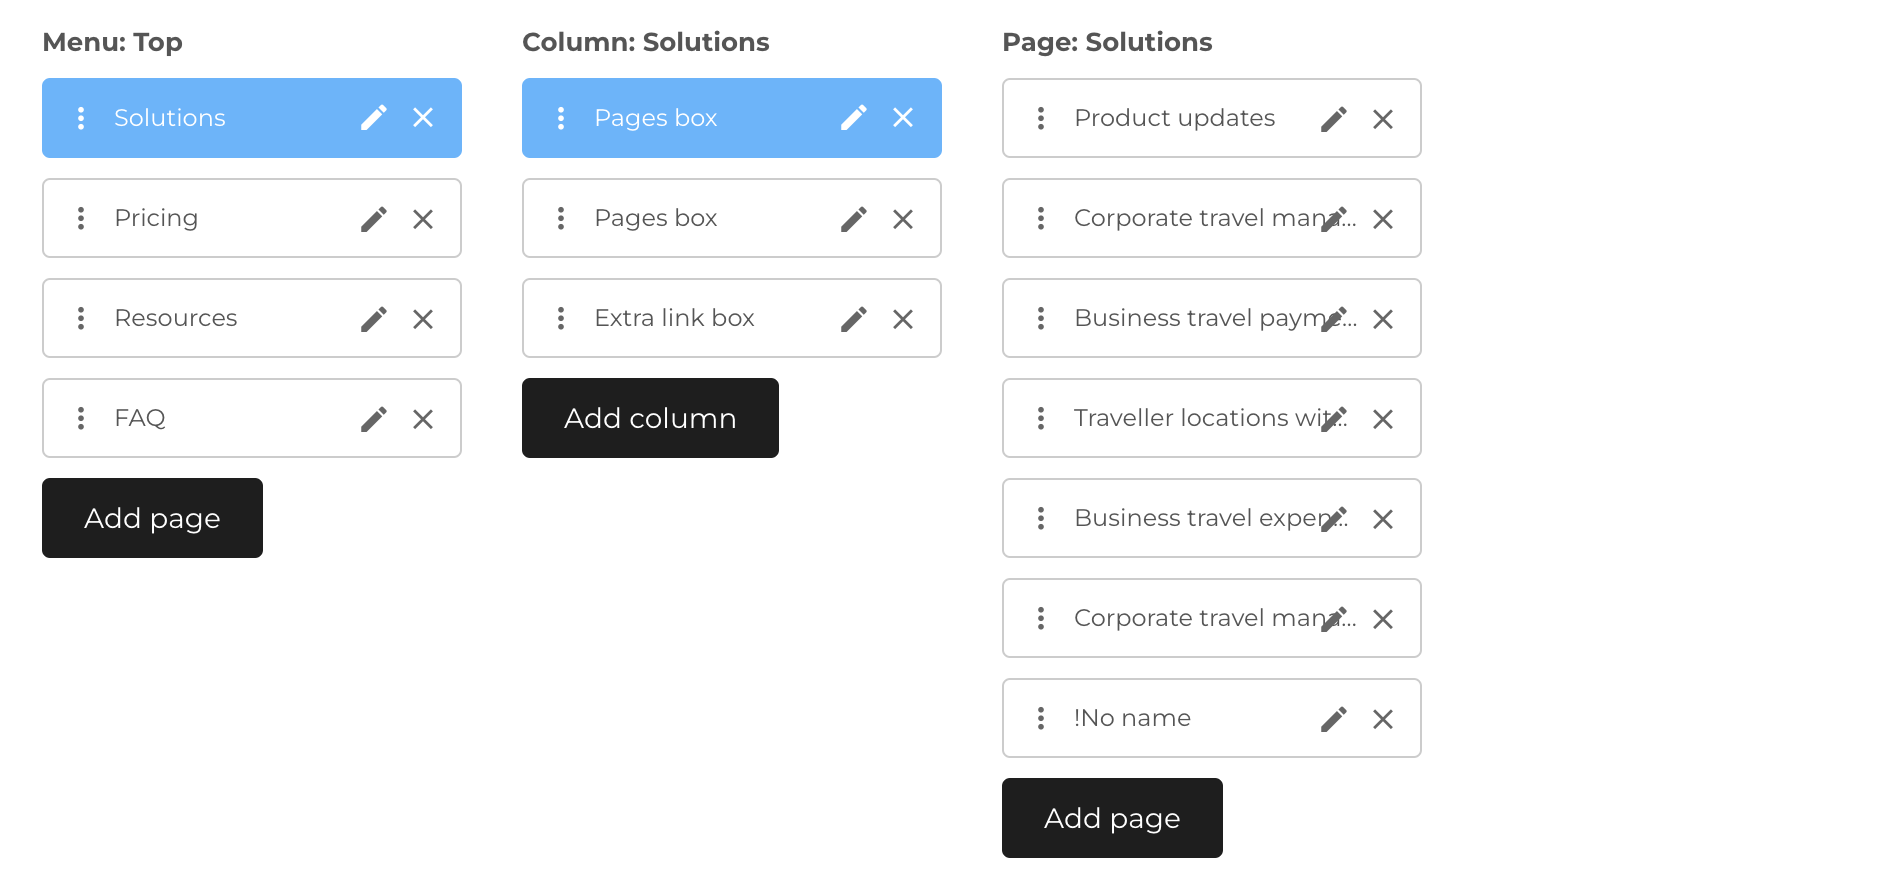
Creating a sub-page (2 level menus) - Pages
After menu column was created (as described above), we can create sub page.
- Click on menu column (NOT the Edit icon)
- After it new list will be displayed with sub-pages (if exists) and button
Add page. - The new menu item is being added to the menu column by pressing the
Add pagebutton. - It will first be displayed this way (
!No name), as no configuration for it is available. - Next, we need to click on the
Editicon on the newly added page - A sidebar for the configuration will be open, where we can configure the page. This is same as described here
- When we configurated all pages - we need to save all changes by clicking
Savebutton in the bottom of the page